|
Have you recently purchased a new release or "Remastered" CD and were disappointed at the sound quality? Did you also notice that you had to turn the volume down, because it sounded louder than your other (and usually older) CDs? Welcome to the latest in music mastering... turning up the volume on the musical source. I have heard various reasons why this is happening. The most common one I hear is to make the songs louder in a jukebox, so they would stand out over the others. There is a "digital ceiling". So, this approach can only work for a certain period of time, before the audio signal has more distortion than listenable music (see my "Tid Bits" article, "Make It Louder" for more on this). And, this process also reduces the dynamics, sonic ability and clarity of the audio material, itself. The signal has to be squashed, compressed and clipped to get the source material louder than that. This introduces distortion of varying kinds, which detract from the original quality of the song. Unfortunately, the reality is that however this process began, record labels and musicians are beginning to desire their CD release to be "louder" than the others they are comparing to or competing against. I have taken on this cause of trying to reverse this trend. I encourage you to also assist me in retaining the best possible audio quality. And, remind others that the volume control on the amplifier is where the loudness should be adjusted. I have heard some rationalize that the majority of listeners have cheap players full of low-resolution MP3s. So, attention to quality is a mute point. I disagree. No matter how cheap the playback unit is, that is no reason to compromise the quality of the source. It is a rule I have gone by for over 25 years. As I have upgraded my audio gear, the music I have played has sounded that much better as a result. With all the great high-end equipment available to allow the recording industry to make such high quality recordings, I find it disappointing that the direction of the final process is to deteriorate the music quality. Why buy all this equipment? To me, it seems like such a waste.
So, if you have Cool Edit Pro (or Adobe Audition) and a CD in your collection
you think suffers from this dilemma, and would like to try and "reverse"
the over-gain issue, read on... RESTORING CLIPPED AUDIO WITH COOL EDIT PRO & ADOBE AUDITION Background -- Before I waste a lot of time recreating what someone else already has done very well, I want to direct you to a great article on www.ProRec.com. On this site, you will find an article called, "Over The Limit", by Rip Rowan. It will give you a good idea what has been happening. But, this article is several years old. And, the reality is that the situation has become much worse. An Overstaturated Track From A Popular
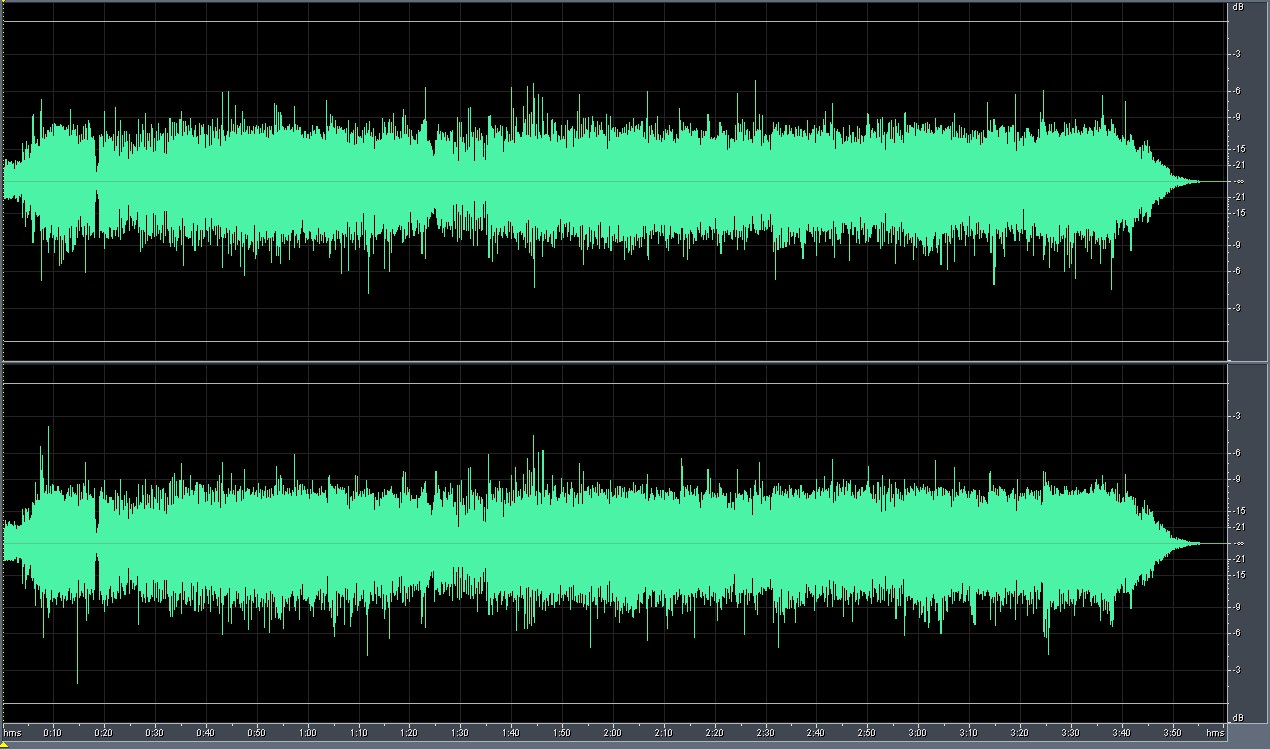
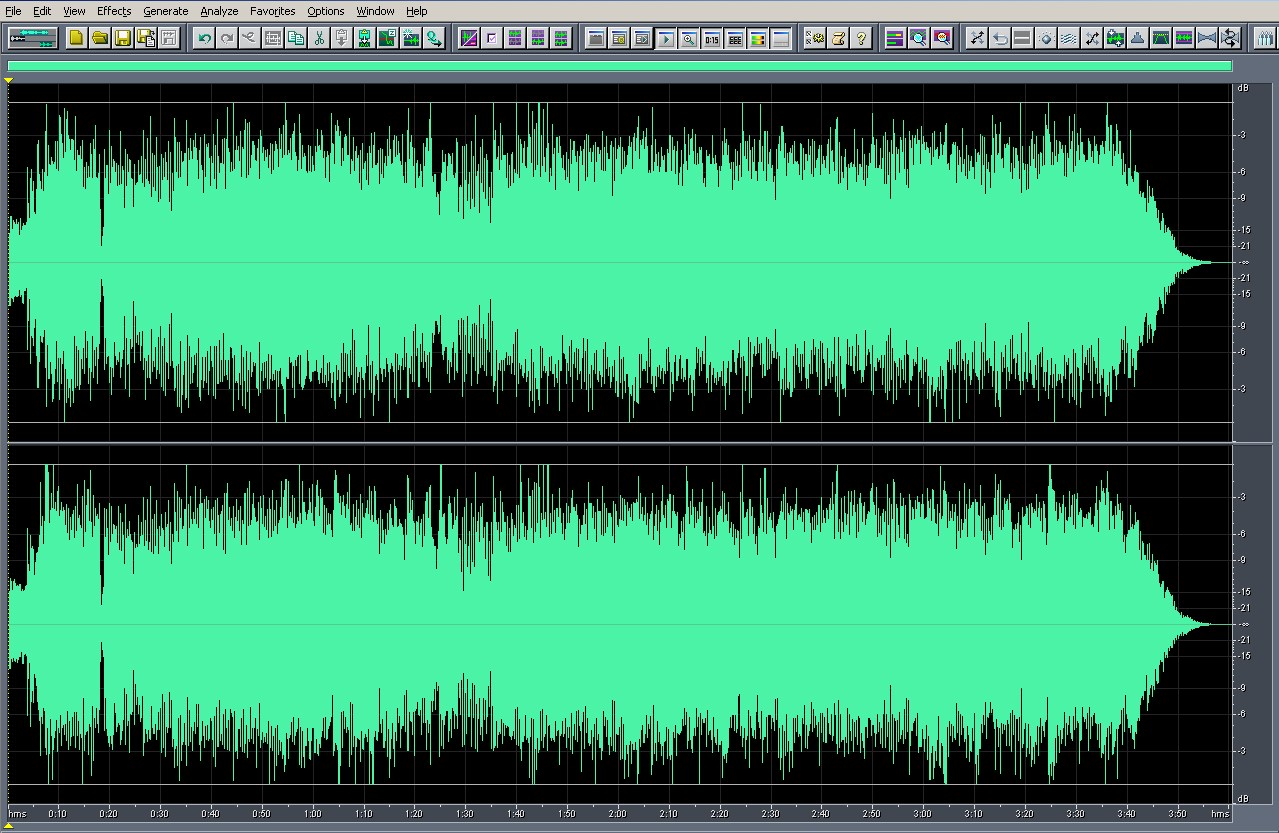
CD -- Here is a visual example of a track off a commercial CD,
that came out in late 2002. Notice that the signal is so "strong"
that it is mostly at "0dB". In fact, the signal is clipped
at the "0dB" point more than 90% of the time, causing flat
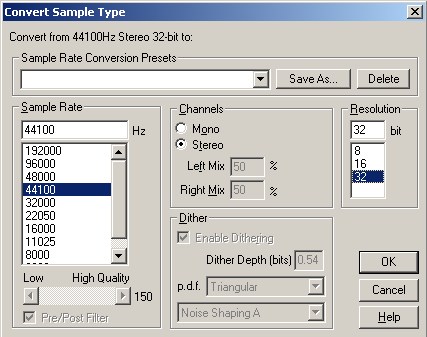
tops on the wave form (distortion). Increasing The Bit resolution To Make
Room For Rounding Errors -- All the following edits are going to
introduce math rounding errors in the least significant bits (usually
the lower 3). So, to minimize (and possibly eliminate) these errors,
first convert the bit depth to 32-bits. Use the "Convert Sample
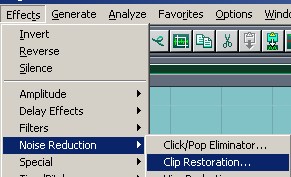
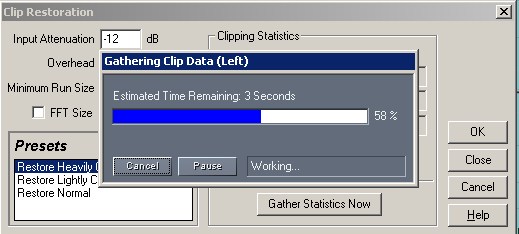
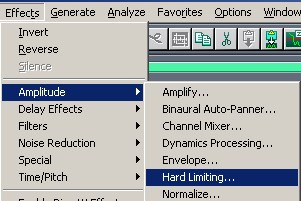
Type" function in the "Edit" menu (also the F11 key). Clip Restoration -- In the "Clip
Restoration" menu, choose the "Heavily Clipped" option,
to get the 12dB reduction, and select "Gather Statistics".
The default sample size for the FFT filter is 32 samples, which I have
found to be optimum. There is no need to select it. The algorithm is
going to have errors in it. And, you may see a number of radical spikes.
These will be addressed. This is only the first phase in the process... Re-assimilating the Wave Form --
After the "Clip Restore", you will most likely notice at lest
one side of the wave form is flattened from the "0dB" clipping.
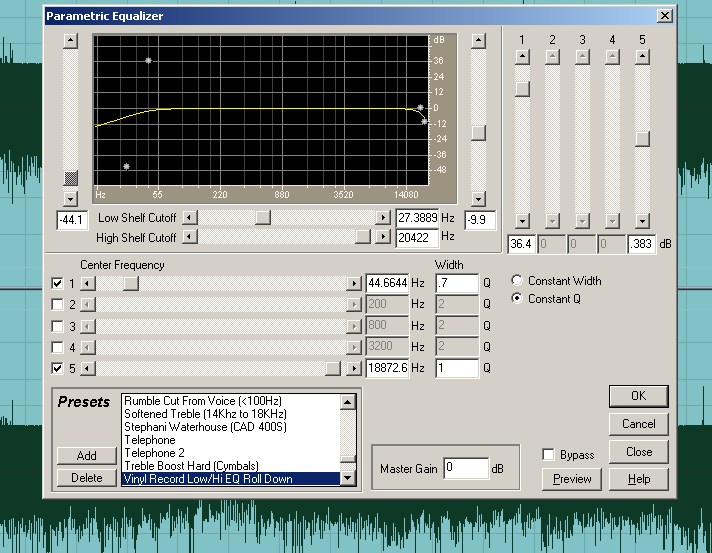
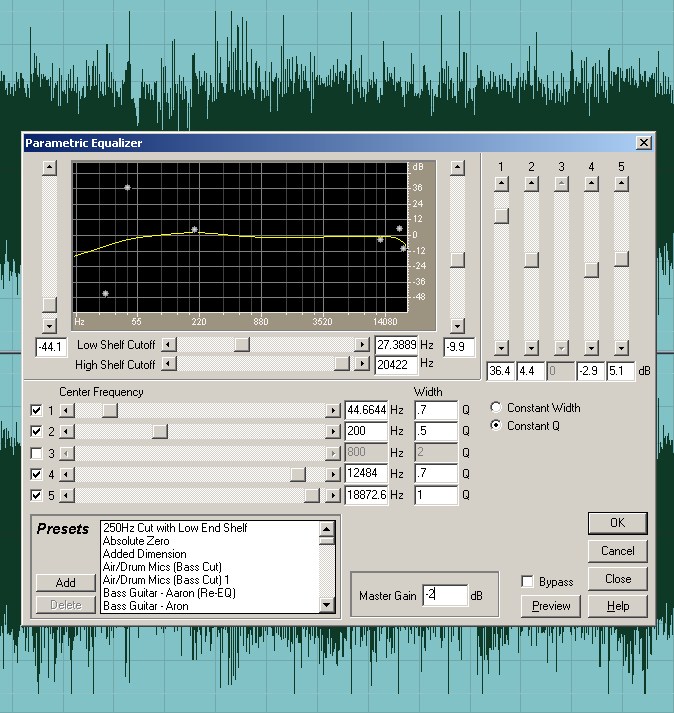
I have found that the "Parametric
Equalizer" (under "Filters" of the "Effects"
menu) of Cool Edit will make a reasonable effort to extrapolate the
wave form. In doing so, it will recreate a wave form that follows both
above and below the "zero" point. But, it needs something
to process. Below, you will see that I've created a roll-off filter
that I use for vinyl records (feel free to copy the settings). It virtually
has no effect on the EQ between 45Hz and 19kHz. But, since it does work
with both the lower and higher frequency bands, the low "Q"
settings make it more of a broad spectrum process. And, this is the
secret to getting CEP/Audition to make a sinusoidal rebuild attempt
on an offset wave form (see the next figure). Here is the result of the
Parametric filter, for my case. You can see how it has begun to take
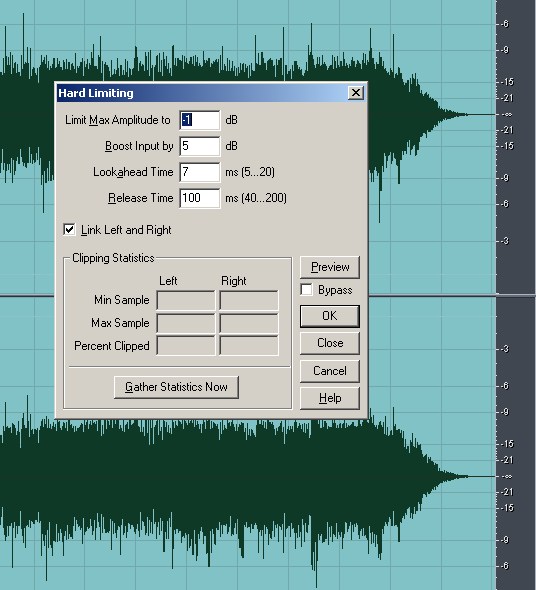
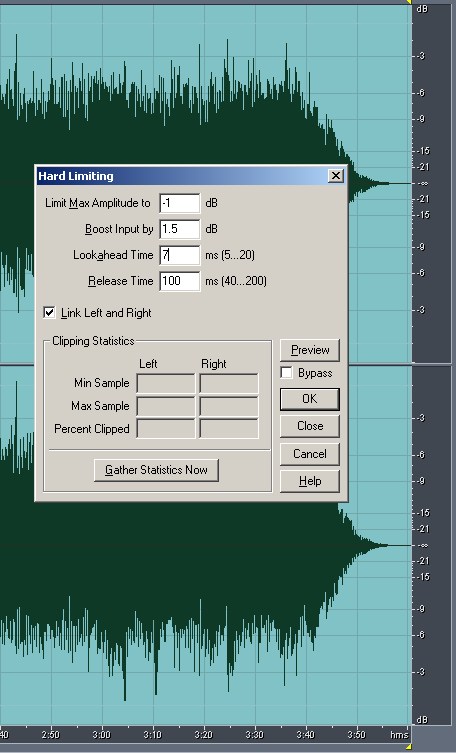
an "acceptable" form... Utilizing The Hard Limiter -- It
is evident that some of the slopes were exaggerated. This is part of
the algorithm's function of anticipating attack rates and rise times.
So, these radical points need to be manually reduced. The "Hard
Limiter" will shave these down for us. Although this will introduce
some clipped signal points, this is less than 1% of the track (as opposed
to the roughly 90% we started with). And, they will be smoothed out
in the following processes. Using your judgment, notice where the body
of the wave form resides. In this example, it is just under the -6dB
mark. Adding breathing room of 1dB, I set the "Limit Max Amplitude"
to -1dB. This will ensure the track doesn't hit 0dB, and save cheaper
D/A converters from distorting. So, my "Boost Input by" will
be 5dB (6dB- 1dB). Revisiting The Parametric Equalizer
-- To help smooth out the hard limits, you can rerun your previous EQ
setting. For personal taste, you can pick this point to EQ the track
to bring out or quieten certain frequency ranges. I chose to EQ boost
some areas, which meant I had to adjust the Master Gain to compensate. Hard Limit to taste (2nd Pass) --
At this point, you can decide to do a basic "Amplify" and
keep the peaks, or use the Hard Limiter to shave the few remaining peaks,
as I have in this example. Here, 3dB seemed too much, so I went with
2.5dB (Boost by 1.5dB & Limit to -1dB). The Final Product -- Compare the resultant
wave form appearance to the original. Barring the file actually sounds
good, then a reasonable refurbished product has been produced. The only
thing left is to convert it back to 16-bit and save it for burning to
an audio CD. Closing Comment -- Obviously, this is not what the original track probably looks like before the heavy compression and clipping. But, it is a reasonable recreation. And, it should be a much more appealing sound than what the original CD track sounded like before "conditioning". In reality, I would have preferred the track had not been squashed so radically. Good luck with your efforts in wave form restoration. Feel free to contact me with questions or comments on how to better this process.
|